How to Manually Enter DNS Settings
Information on how to manually enter a primary and secondary DNS into the internet settings of a Nintendo Switch console.
Important
- The following are public DNS provided by Google and are subject to Google's Terms of Service. If you prefer to not use this service, doing an internet search for "public DNS" will provide you with several other options you can use.
- If you wish to use your own DNS servers, you may do so by entering in the DNS servers found in your network settings.
Complete These Steps:
- Select “System Settings” from the HOME Menu of your Nintendo Switch console.
- Select “Internet”, and then “Internet Settings”. Your Nintendo Switch console will automatically search for nearby Wi-Fi signals.
- Select your network from the list of networks located under “Registered Networks”.
- Select “Change Settings”, then scroll down and select "DNS Settings".
- Select "Manual".
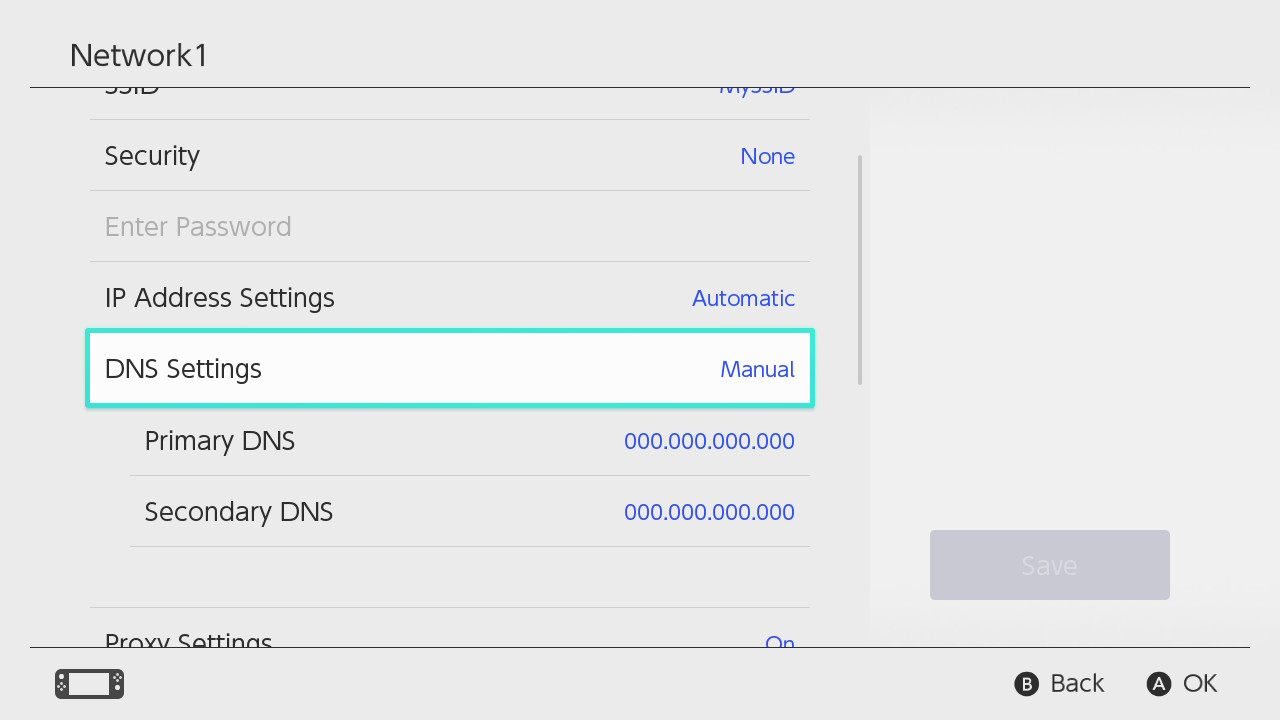
- Select "Primary DNS" with the A Button, and then hold down the B Button to delete the DNS (it defaults to zeros).
- Enter 8.8.8.8 as the primary DNS, and then select "OK".
- Select "Secondary DNS" with the A Button, and then hold down the B Button to delete the existing DNS.
- Enter 8.8.4.4 as the secondary DNS, and then select "OK".