How to Attach/Detach the Joy-Con Controllers from the Joy-Con Grip
Instructions for attaching and detaching the Joy-Con controllers from the Joy-Con grip or the Joy-Con charging grip accessories.
Additional Information:
- The Joy-Con grip accessory (model No. HAC-011) included with the Nintendo Switch console allows you to combine both Joy-Con controllers into a more traditional-style controller.
- Additionally, a Joy-Con charging grip (model No. HAC-012) is available and is sold separately. The Joy-Con charging grip allows you to keep playing while you're charging your Joy-Con controllers, so you don't have to miss a minute.
Complete These Steps:
How to attach the Joy-Con controllers to the Joy-Con grip or Joy-Con charging grip.
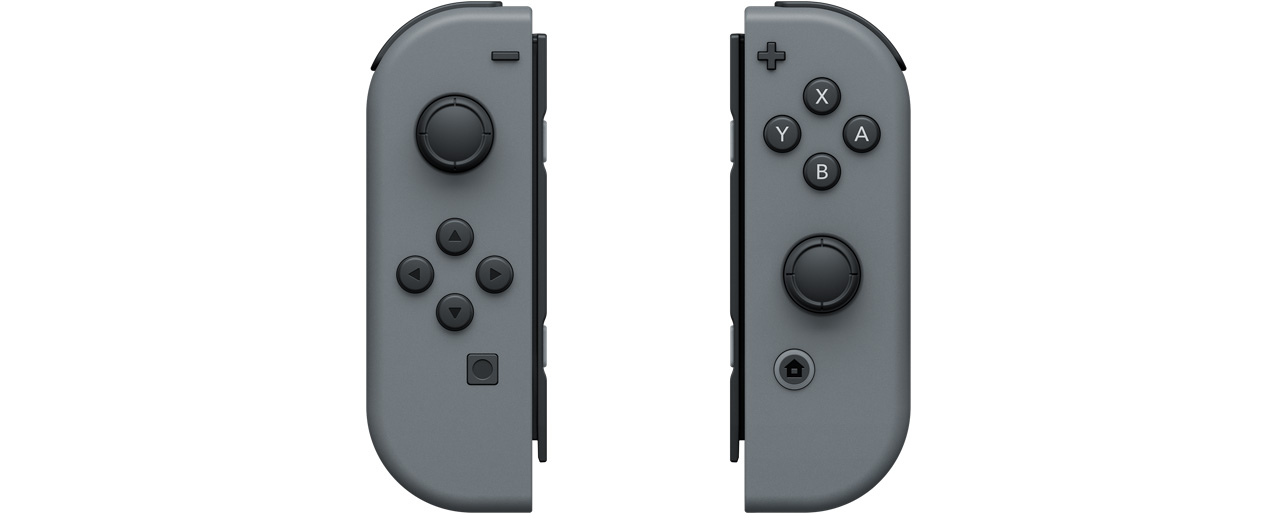
- Make sure the Joy-Con controllers are correctly oriented.
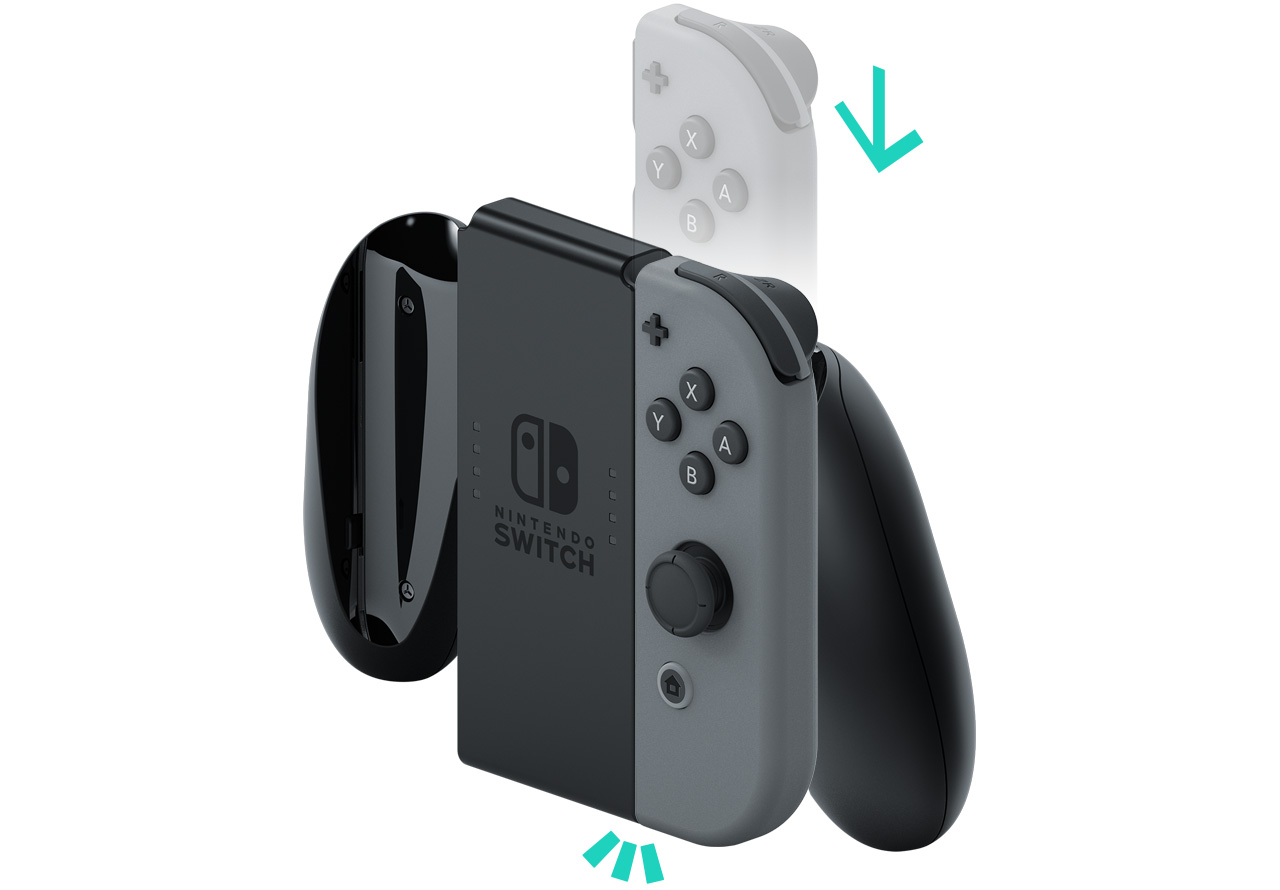
First, ensure the Nintendo Switch logo and the player LEDs on the Joy-Con grip or Joy-Con charging grip are facing you. To ensure the right and left Joy-Con controllers are positioned properly, align the - Button on the left Joy-Con with the top-left corner of the Joy-Con grip or Joy-Con charging grip. Then align the + Button on the right Joy-Con with the top-right corner of the Joy-Con grip or Joy-Con charging grip.
- Attach the Joy-Con controllers to the Joy-Con Grip or Joy-Con charging grip.
Use the rail on the side of the Joy-Con grip and slide each Joy-Con down from top to bottom, until you hear a click.
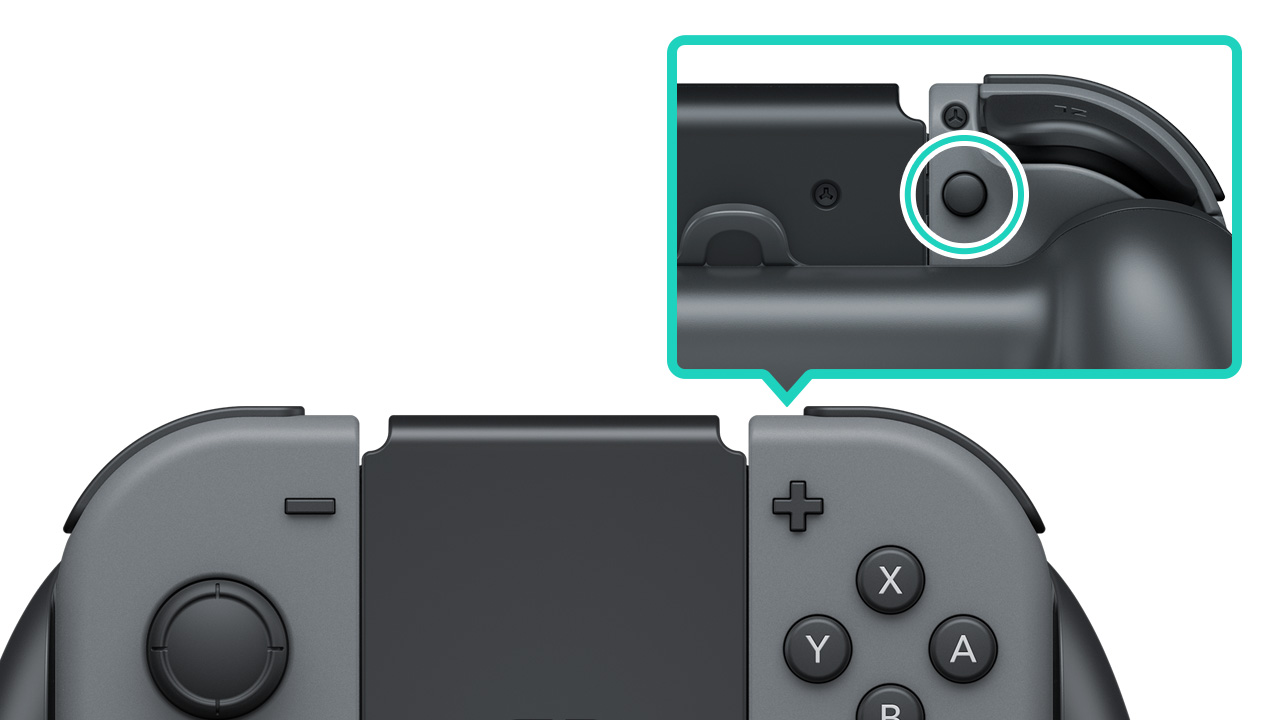
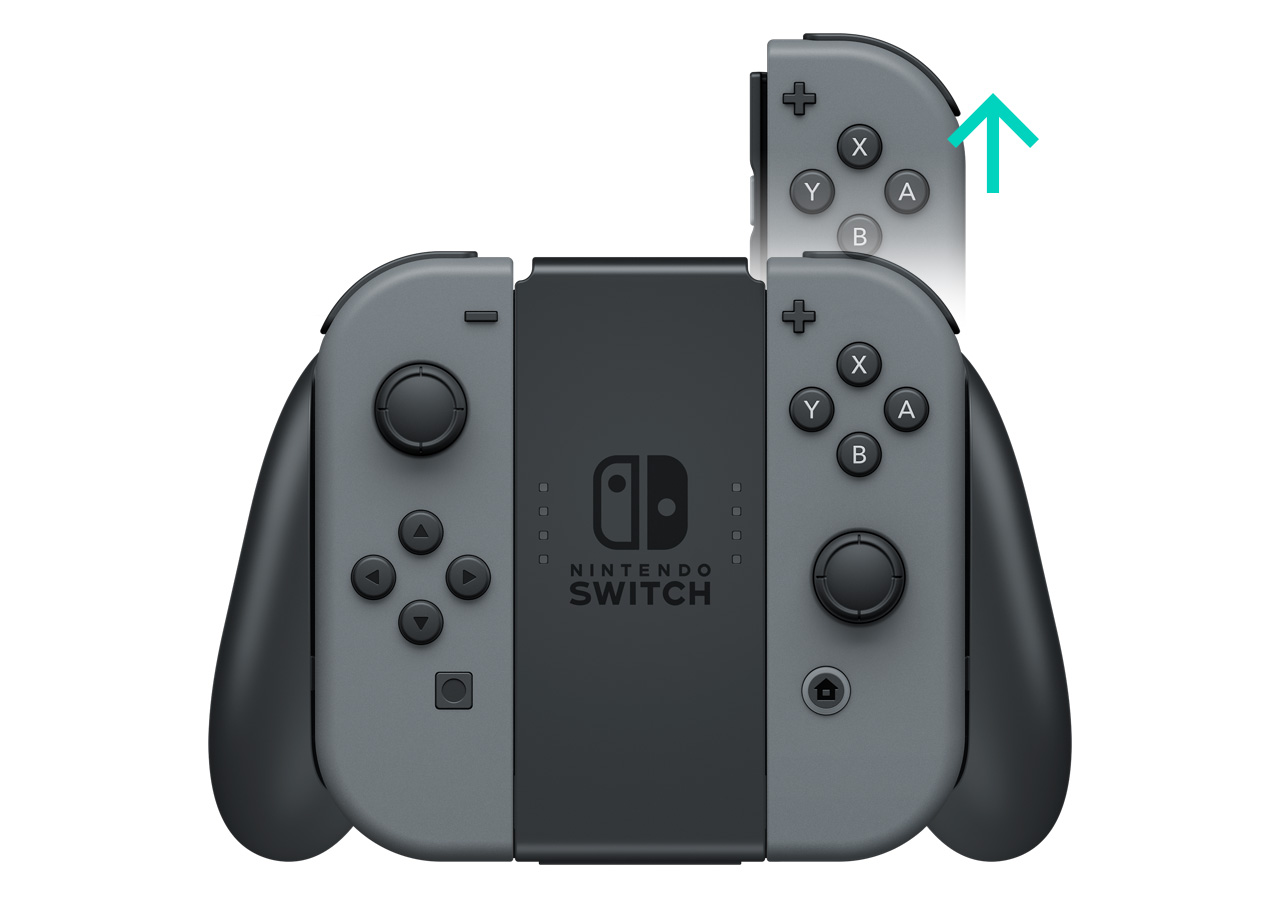
How to detach the Joy-Con controllers from the Joy-Con grip or Joy-Con charging grip.
Press the release button at the back of each Joy-Con while sliding it up from bottom to top.